A Place to Share Sewing & Quilting Experiences

Archive for the ‘Sewing’ Category

Baby Quilts and Christmas Projects

I just checked and I have not posted since April.  Oh boy, there’s been a lot going on.  My daughter just started her Junior year at JMU and I’ve become an ambassador with Plexus Worldwide.  We specialize in health supplements.  Hardly leaves time for quilting, or so you’d think.  My guild chapter started a UFO challenge back in January.  We each put a fat quarter in the pool and we get to put our name in the hat for a drawing at the end of the year for each UFO we finish and bring in for show and tell.  We meet twice a month, so my goal is 24 finished UFOs by December.  I just finished #20.  OK, that is for another post.  I still haven’t shared some of my quilts from 2014.  I need to get busy!

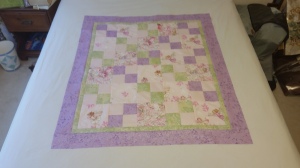
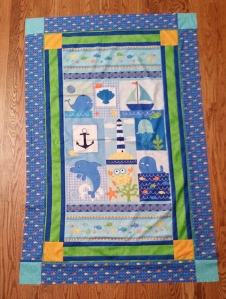
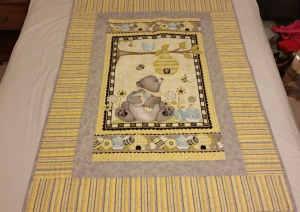
Here are the three baby quilts I completed as gifts.

yellow and gray baby quiltfairy baby quiltseal creatures baby quilt

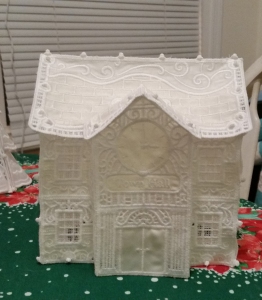
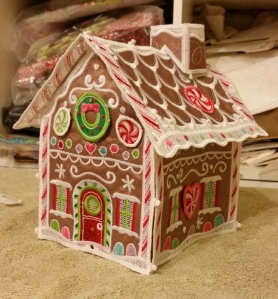
And now for some Christmas Embroidery projects.  I just love the OESD Christmas Village designs.  I’m really behind on them, but the ones I do have finished take up an entire kitchen table.  Here’s the Town Hall and the Gingerbread House.

lace town hall lace gingerbread house

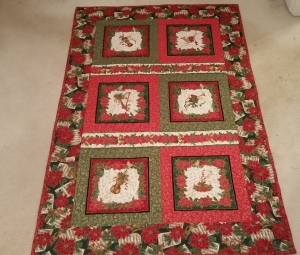
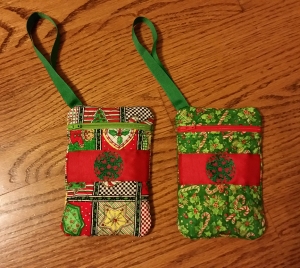
I made some Christmas wristlet bags on my embroidery machine (in-the-hoop designs) for Christmas presents and finished a Christmas Music Quilt.

christmas music quiltchristmas wristlet bags

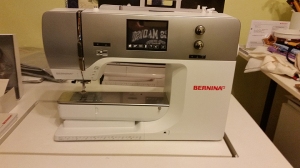
The biggest news of 2014 was I got a new Bernina machine to add to my sewing studio.  It is a Bernina 750 and I absolutely love it.  Amazing for embroidery, free-motion quilting and so much more.

bernina 750

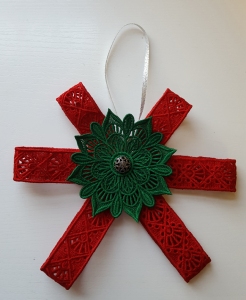
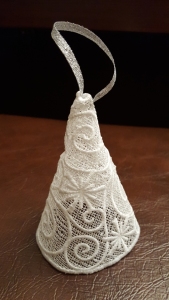
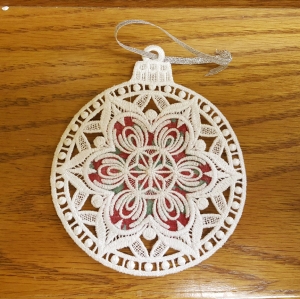
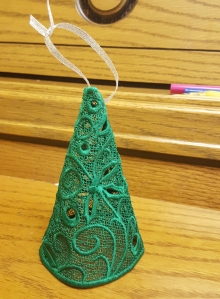
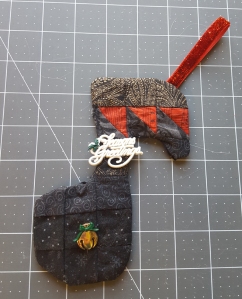
Last but not least, here’s the bunch of Embroidery Christmas ornaments I made for various “exchanges” and parties over the Christmas season.

ornament 1 ornament 2 christmasexchangeornament22015 ornament 3 ornament 4 ornament 5

I’m done.  Until next time, happy sewing & quilting!!!

Melinda

Let’s Play Catch Up – It Has Been Way Too Long

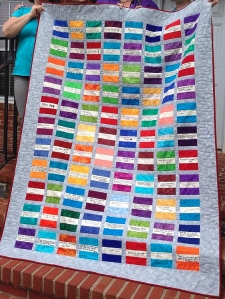
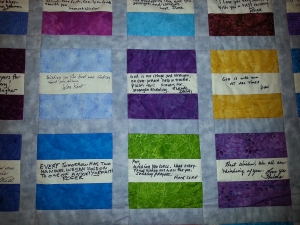
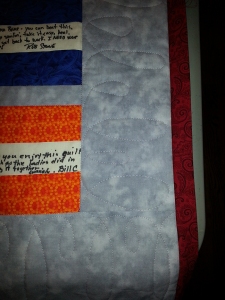
This post is going to have a lot of different types of projects.  It has been so long since I’ve posted and many projects have come and gone.  Let’s rewind the clock back to August 2014.  I’m getting ready to send my one and only sweet daughter off to college and emotions are running high.  One of our co-workers was diagnosed with breast cancer a few months earlier.  We wanted to make her a comforting quilt to get her through the hard days ahead with surgery and treatments.  We made simple blocks with a place in the center for everyone in our company to sign well-wishes and prayers to her.  Here’s the quilt and a few close ups.

Pat Signature Quilt

Pat Signature Quilt Close UPPat Signature Quilt Border Close UP


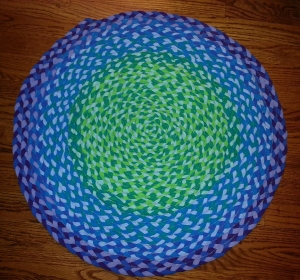
Second project, before my daughter went off to college, she wanted to make a rug for her new dorm room to match her comforter set.  We went to our local Goodwill store and bought up a bunch of t-shirts.  She cut them into strips and rolled them up in balls.  Then she took three colors at a time and braided the rug.  My job was to sew together the braided rows into a circular rug.  It turned out really cute and she used it her first year of college in her dorm room.  Here’s the photo!

Abby Dorm Rug


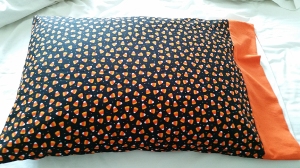
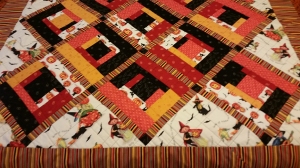
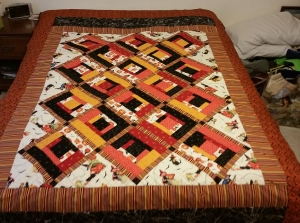
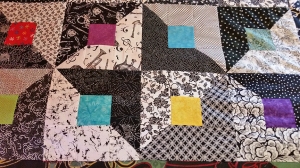
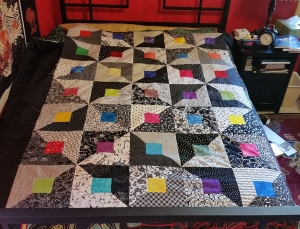
Fast forward to the fall season.  My daughter and I had started a Halloween quilt together many years and due to crazy schedules, it got put on the shelf.  After she went to college, I wanted to finish it for her dorm bed for Halloween.  It was emotional dragging it back out, but I’m glad I did.  She enjoyed it during the Halloween season.  I also made a Halloween pillowcase/sham to go with it.

Halloween pillowcaseHalloween Quilt Close UPAbby Halloween Quilt

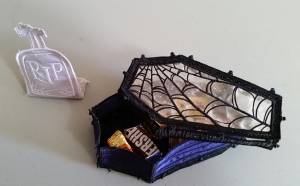
Another fun Halloween project was this machine embroidery free-standing lace coffin.  Lots of pieces, but way fun to put together and even more fun to decorate with!  This design was from OESD!

Free Standing Lace Coffin

For our annual Fall Fest meeting, I finished a quilt top of the raffle blocks I’d won at a previous full chapter meeting (I think it was the previous Spring Fest).  I may have already posted some of those blocks, but here’s the finished top.  It is on my “UFO to do List” that I plan on finishing this year.  I just need to decide if it needs a border to pull it all together and we’re off.

Raffle Block Close Up Raffle Block quilt

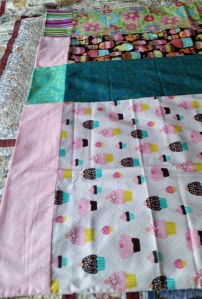
Prior to our Fall Fest our chapter got together to make pillowcases for charity (the chapter hosting the above Fall Fest event asked for these).  Our chapter made all these great pillowcases.  They took little time to make and were so much fun.  Plus it is always fun to have an excuse to get with your quilting friends and sew, sew, sew!

My pillowcases My pillowcases 2 Moonlighters Pillowcases More Moonlighters pillowcases

OK, enough for this time.  I’ll start up next time with the Christmas projects of that year.  Until next time, Happy Sewing & Quilting…

Melinda


Graduation – A Year Later

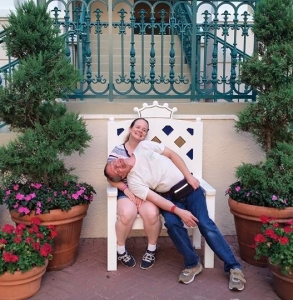
Wow, the time has flown since my daughter graduated from high school.  I still have projects from that time that I haven’t posted yet, so shame on me.  Life has been a little crazy recently.  We just returned from a 8 day vacation to sunny (and yes very hot) Florida.  For our 25th wedding anniversary (June 16th), we decided to take a family trip to Disney World and Universal Studios.  We are big Harry Potter fans so we had to see the Harry Potter World at Universal Studios.  I had two misconceptions – #1 it will be nice weather in Florida in May.  Yikes, it was mid 90’s most of the trip.  #2 – It won’t be as crowded since school-aged children should still be in school.  Wrong again, Disney had tons of little kids too young for school and Universal Studios had tons of school groups.  Lots of crowds and very hot temperatures, but it was still a fun trip.  We walked our feet off.  We did 3 days at Disney and 3 days at Universal Studios without a break in between.  Yes, that was my ambitious scheduling.  Here’s a fun photo of me and the hubby having fun at Disney. Chip and Mel at Disney


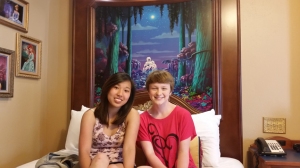
At Disney we stayed in a Royal room at the Port Orleans Riverside resort.  That was a great place to stay and we had so much fun.  Here’s a photo of my daughter and her best friend in the princess-themed room.

Abby and Casey at Disney

We moved my daughter home from James Madison University where she completed her freshman year as a music education major just three days before leaving for our vacation.  The boxes are still all over the house.  Not sure where they will go until she moves back in August.  I’m so proud of her…she made the Dean’s List both semesters.  She’s going to be working at a local grocery store as a bakery-deli clerk and taking 7 credit hours at the local community college.

OK, now back to the business of sewing and quilting.  I have a lot of projects to catch you up on.  I had been having trouble with my Bernina 830 and broke down and took it in for an overhaul.  I’m happy to report after replacing a few small parts and a thorough take apart/cleaning my baby is doing very well.  I haven’t put her back on the quilt frame yet, but plan on doing that once the excitement of moving my daughter home from college and vacation wear off.  Can’t remember if I shared this or not, but in November 2014, I became the proud owner of a Bernina 750.  I absolutely love it!  I haven’t found anything it can’t do yet (except the dishes…darn!).  I traded in my work horse Bernina 440 which made me sad, but it was time to move on.

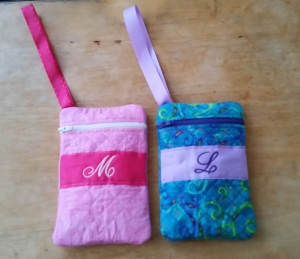
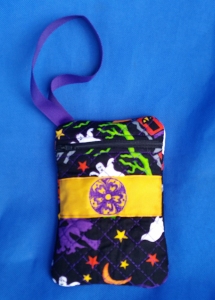
These projects are from last May, so here goes.  I did a Bernina retreat at my local quilt shop, Cottonwood called Sew-A-Palooza.  It was so much fun and we got an embroidery design to make these little in the hoop wristlet bags.  I have made close to if not more than 30 of them.  I used them as gifts for my guests at my daughter’s graduation party last May.  Here are some of the bags.  I finally start making some for myself and have made a bag for every month October through May (yes I really need to get started on my June one since it is coming very fast).  It is fun finding cool fabrics, ribbons, etc. to make these.  I also made two JMU ones for my daughter and her first year college roommate.

Wristlet In the Hoop BagsMore Writslet In the hoop bags Halloween wristlet bag

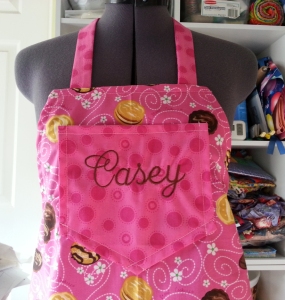
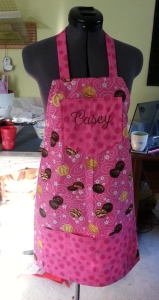
Last project for this post was a gift for my daughter’s best friend.  She loves to bake and always wears my Girl Scout Cookie apron I made a few years back when she bakes at my house.  I made her a similar one and embroidered her name on it for her graduation gift.  It was such a fun project and she really liked it.  Love that Girl Scout cookie fabric!

Casey apron close upCasey apronUntil next time (and hope it isn’t so long from now), happy sewing & quilting!

Melinda


Bags, Bags and More Bags

I keep meaning to share another project with you, but life gets in the way.  There has been so much going on during the holidays and having my daughter home from college.  Her college marching band took a New Year’s trip to Rome, Italy so there was a lot of preparation for that in the days leading up to Christmas.  What an experience of a lifetime though.  My only regret is not getting to go with her.  Since I seem to be so slow in sharing, I’m going to combine a few items in this post.  Buckle your seat belts!

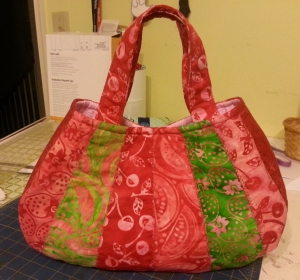
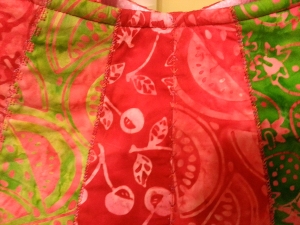
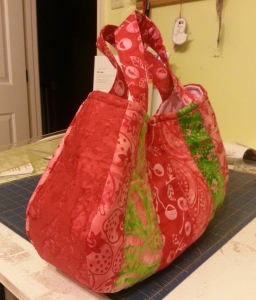
First was a purse that I had bought a kit for a few years back.  I kept getting the instructions out and then putting them back.  This year my goal was to sew up a lot of the purse/bag kits that I’ve bought at quilt shows over the years.  The first bag is the Manhattan bag made out of fun watermelon and strawberry fabrics.  This was a great purse to carry in those warm summer months we only dream about now in cold January.

Here are some photos.  Between the panels I did some decorative stitching with variegated thread which was a lot of fun.manhattan bagmanhattan bag 2manhattan bag 3


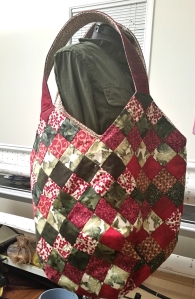
Next on the list was the “Mondo Bag” which was a fusible square kit.  This bag was really huge and I used half of a jelly roll to make all the squares for the bag.  This bag would make a good weekend or overnight bag.

mondo bag

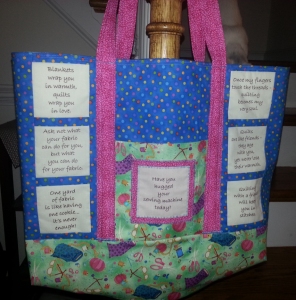
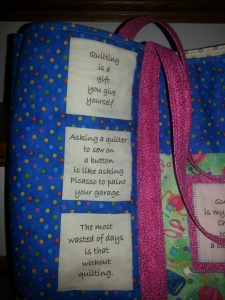
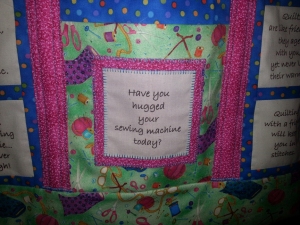
Next bag kit to finish was this quilter’s tote.  The kit included pre-printed quilt related sayings.  I love this bag and use it to tote my projects and show n’tell to my quilt guild meetings.  Love the sewing theme fabric in this one.

quilters totequilters tote 2quilters tote 3

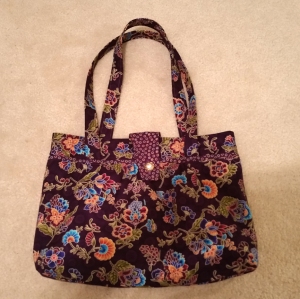
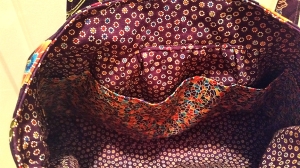
Last, but not least is another purse kit I bought on a quilt tour.  Love the purple colors of this bag and am using it now for fall and winter.

purple bagpurple bag inside

I’ll try not to go so long between posts next time, until then…

Happy sewing & quilting!

Melinda

Baby Girl Ensemble

When coming up with a baby shower gift for a friend that is having a girl after two sons, I wanted to do something a little different.  I grew up sewing clothing learning from my mom and my grandmother owned a fabric shop.  Sewing runs in the family.  I sort of gave up on garment sewing due to my weird body type, and the fact that I never got the hang of altering ready-made patterns to fit me.  I found quilting to be a lot more fun and rewarding.  So for this gift I decided to brush up on my garment sewing skills and make a little ensemble for the new little sweetie.  Since she is to be born in April, I thought a Spring outfit with a sun dress, bonnet and bib would be great.  I found a couple fabric in my quilting stash and got to it.  It really wasn’t too difficult and I was pleased with the results.  I like giving a gift anybody just can’t go out and buy off the shelves.

I’m not the best cell phone photographer and with auto upload to Dropbox, I’m just lazy about dragging out the good camera.  Here’s the outfit.

"baby girl ensemble"

Until next time, happy sewing & quilting,

Melinda

Christmas Projects 2013

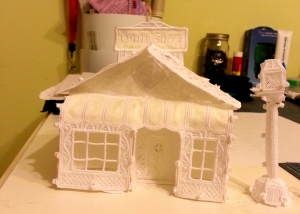
Wow, I can’t believe I’m just now sharing with you my projects from this past Christmas.  With Spring just around the corner I wanted to get these posted before the warm Spring sun makes me forget about this cold, snowy winter.  My first project is OESD’s Christmas Lace Quilt Shop.  I have about five pieces from this collection stitched out and assembled.  The set is getting too large for my mantel, so this year they lived on the dining room table on top of a gold sparkle, lighted table runner my mom got me last Christmas.  I wish I had thought to take a picture of the “village” as it is now.  My sweet husband got me another piece so I will have to more additions to the collection hopefully by next year.  Here’s the quilt shop along with the lamp post.

Free Standing Lace Quilt Shop

Got to make a stocking for our newest kitty “Pippa” that joined our family last January.  She can almost fit in it!

"Pippa Stocking"

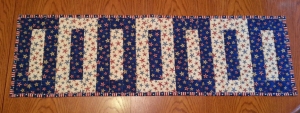
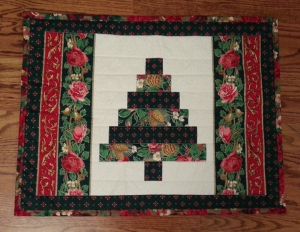
I made three table runners and a small Christmas Tree wall hanging that were gifts for family members.

"table runner 1"

"table runner 2"

"table runner 3"

"Christmas Tree Wall Hanging"

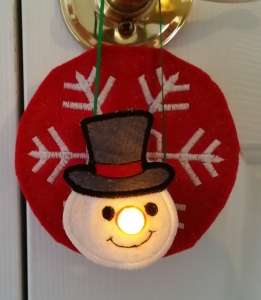
These cute mylar snowmen ornaments were for my quilt guild’s Christmas party ornament exchange.  They were so cute and fun to make.

"mylar snow people"

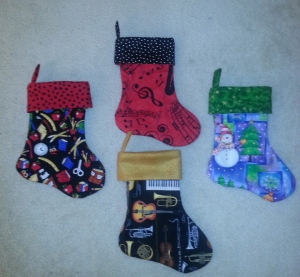
Here are a couple mini stocking my daughter and I made this year.  She stuffed them with small treasurers and they were gifts for her friends.

"mini Christmas Stockings"

These mylar angel ornaments went to my mom as a thank you for all she does.

"mylar angels 1"

"Mylar Angels 2"

I think that’s enough for one post.  I think I got all the Christmas stuff posted.

I really, really am going to break out the 830 and Bernina quilt frame in the very near future.  I have three quilts that need to be finished very soon.  My Bernina dealer gave me some tips on making my 830 a little less finicky.  I hope they work.

Until next time, happy sewing and quilting,

Melinda

Prom 2013 – The Dress

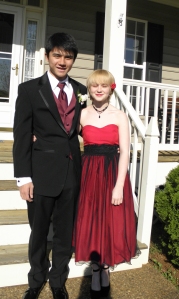
Last fall my daughter designed her own prom dress based on a cute violin purse my mother-in-law gave her.  We were in a fabric store and she found the perfect fabric.  That was months ago.  Prom was last night, so I’m allowed to post her story.  She started with a basic strapless bodice pattern and full gathered skirt.  I helped a little but she did most of the work.  It was her creation.  She made a prototype out of basic satin fabric that was about the same weight and feel of her fabric.  Since the test garment fit, she cut out the “real” dress.  After finishing the red strapless part of the dress and trying to get the perfect fit to the bodice, we made the black tulle over skirt and the black lace sash.  I think the dress turned out beautifully.  Here’s the dress on the form.

"Finished Prom Dress"

Then here’s my grown up daughter going to her first prom in a dress she designed and made.

"The Big Night"

Here’s the handsome couple.  Oh, I remember when she was little and I made us dresses to match.  The time sure does fly.  Wow, I couldn’t walk or drive in those shoes.  She rocks!

"Prom Night 2013"

Until next time, happy sewing & quilting,

Melinda

Quilted Diaper Bag – His & Hers

Last Friday I had a slight panic attack.  I had a baby shower the next day and didn’t have my gift made.  I’m one of those crazies who can’t just go out and buy a shower gift.  I have to make something.  Our pastor’s wife is having twins and we had a church-wide baby shower last Saturday.  They are having a girl and a boy and had picked green and brown as the nursery colors.  I usually like to make quilts for babies to be, but I like to give them when the children are born so I can customize a label.  Usually I make my custom baby bibs, but I wanted to do something different.

I was running out of time.  I had ordered the cutest pattern for a diaper bag a week ago and as of Friday morning it still hadn’t arrived…yikes!  So I went for an adventure dig in my closet.  I found some bag patterns that would fit the bill, then I found a baby quilt pattern which had diaper bag instructions…we have a winner!  The diaper bag called for a strip of pieced blocks, but I knew time was too short for that.  The pattern was “Butterfly Flip” by Atkinson Design.  I love their patterns and this one was no exception.  I hit a few bumps and snags along the way, but I was happy with the end result.

Here’s a quick peek at the finished diaper bag.

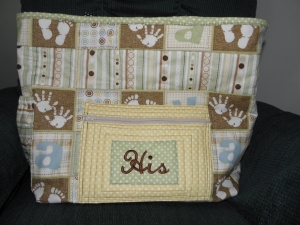
"His and Hers Diaper Bag"

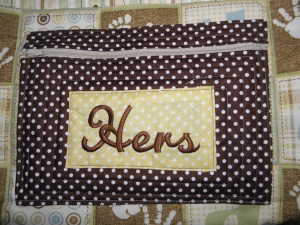
There were zippered pockets on each side, so I thought a his and hers pocket would be good to help the parents keep track of what belongs to who…especially with medicine and pacifiers.  I embroidered His and Hers on each respective pocket.

"His Side Diaper Bag"

Here’s a peek at one of the embroidered pockets.  I love these fabrics and colors.

"Pocket Close Up"

The bag had you quilt the pieces, then sew them together.  There is an elastic gathered pocket on one end of the bag for a bottle, cell phone or such.  Here’s a view of that pocket.

"Gathered Pocket"

The crowning touch came to me when I was about finished with the project.  I took matching ribbon and put through each zipper pull and attached a pacifier clip to each side of the bag.  That way no swapping around of pacifiers.  OK, it is a little hard to see.  Maybe I should have picked a pacifier clip that wasn’t green.

"Pacifier Clip Pocket"

Once the bag was done, I went shopping for baby goodies to fill the bag.  This was a fun project, but I wished I had gotten my act together and started before the day before the shower.  Six hours hard sewing at one time really was a bit rough.  It was all worth it though.  I’m usually one of those who plans months ahead of time.  Guess I’m getting slow or lazy in my old age.  Maybe I just like the stress…not!

I’ve already started on my next project (actually there was a Valentine’s Day quilt for me in between these projects that I just finished up the top for).  My quilt guild makes quilts for an “at risk” preschool program called Bright Stars.  I’ve committed to making four of these 40″ x 50″ quilts by our SpringFest meeting in early May.  I have all four tops pieced (they were panels with borders mostly) so hopefully I’m on track.  I also have a Christmas ornament project I want to share with you.  Lots to share, just not a lot of time to write about it (or take photos).

Until next time, happy sewing & quilting!

Melinda

Totes, Purses & Bags Oh My

I have to admit an addiction I have.  Yes, I’m a purse and tote bag kit addict.  I flock right to them in quilt shops and the quilt shows I attend.  I probably have over 20 kits in my stash right now.  I love the way they look, or their functionality or just the cool fabrics they will be made from.  Then I make them mine.  Here’s the problem.  I get them home, open them in anticipation, then read the instructions.  Ugh…don’t know if it is laziness or just my frame of mind at the time, but they 95% of the time go right back in their bag, and go hide in my sewing closet.

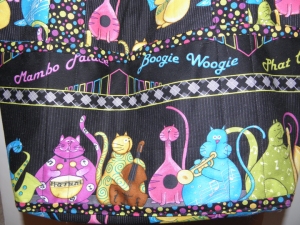
Earlier this summer, I vowed to make some of the elusive bags before I allowed myself back to my quilt top sewing frenzy.  I picked a couple I really liked and dove right in.  I refused to let the instructions intimidate me this time.  I am an educated woman that can follow instructions, right?  I first picked the Phat Cats Jazz Tote Bag kit that I bought at a quilt show a couple summers ago.  I love the fun fabrics and since my daughter is in our high school Jazz Ensemble, it made sense to start with this one.  Wow, it was fun and went together pretty quickly.  If I had it to make again, I’d add  pockets to the inside.  You can never have enough pockets.  Here’s the finished Phat Cat bag.

"Phat Cat Jazz Tote"

Here’s a close up of the fabric.  Love those cute jammin’ kitties & the color combinations.
"Phat Cat Jazz Tote Close Up"

Next I decided I wanted to make one of those cute little “Potato Chip Bags” designed by Paula Hughes.  The size is not one I’d ever be able to use on a regular basis as a purse…I just have to carry around too much stuff, but I thought my teenage daughter would like it.  Plus it has a musical theme and a couple of her favorite colors to boot.  It went together pretty easily too.  Wow, I can do this.  Two down.  Here’s the Musical Potato Chip Bag.  I will most likely make this one again.  It only took 3 fat quarters and who doesn’t have tons of them lying around in their stash right?

"Musical Potato Chip Bag"

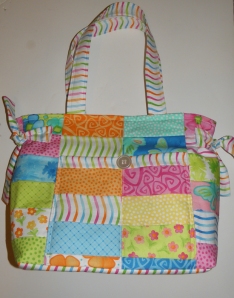
Bag #3 was a bit more challenging, but it is my favorite and I am now using it as my purse and I’ve gone over two weeks without complaining about stuff getting lost in the bottom or not having enough pockets.  Rather than give up, I took it one step at a time.  The pattern is “Hamptons Handbag” by Pink Sand Beach Designs.  I have several more of their purse kits and will probably do them next time I get the hankering for “bagging”.  I chose the Moda “Twirl” fabric line for this one…love the bright summer colors.  It used lots of fusible fleece, decorbond and interfacing, but it is worth it.  The bag has good stability and is quite functional.

Here’s the finished bag.
"Hamptons Handbag"

Yes, I have overcome my bag phobia and can go back to piecing quilt tops.   I’m still trying to work a week into my schedule to do nothing but quilt my huge tops stash info finished quilts with my Bernina quilt frame and Quilt Motion.

I bought another new addition for my sewing studio this weekend (not counting the new computer and desk…that counts mostly for work).  I have been keeping my eyes on the Bernina Cutwork tool and software for a while now.  I went to a Sewing Celebration at my local dealer this weekend and decided it is a must have for my collection.  For those of you not familiar with the product, the “tool” replaces the needle on my embroidery machine and will cut out applique shapes, do traditional cutwork and more.  The demonstrator cut out 60 hexagon blocks in 6 minutes using the tool & software.  Oh yea, I could definitely get into that.  I got the software installed but will have to wait to use it because my dealer had to special order the throat plate that works with the tool.  Hopefully I’ll be up and running with this new toy in the next week.  Bernina also just came out with two new additional pieces to their design software that they unveiled at Bernina University this past week.  PaintWorks and CrystalWorks.  Oh my have to start saving up for those.  The PaintWorks tool allows you to paint on fabric using a special pen and your embroidery machine.  The CrystalWorks tool punches out a crystal pattern for you, then you apply to your fabric, pour on the crystals, brush them, place a template over them and iron on.  Sure beats adding them one at a time with the little wand.  I never got the hang of that anyway.

Until next time, happy sewing & quilting!

Melinda
Baby Shower Gifts Can Be Fun

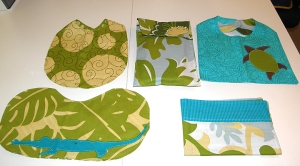
I love baby showers.  Unfortunately I’m getting to the age where I’m invited to fewer and fewer of them.  With the invitation comes the question of what to make for a gift.  It is a rule with me that I have to make something…even if it is just the card for the event.  Recently I went to a friend’s baby shower.  There is more pressure when the mom-to-be is a quilter herself.  This time I went with an old stand by of bibs and burp cloths.  I was lucky to find a kit at JoAnn Fabrics that made it easier.  The colors were so fun and bright, I couldn’t resist.  Here’s a photo of the first round of gifts.  There are two bibs, two burp cloths and a diaper wipe holder.
Baby Shower Gifts

Baby Shower Gifts

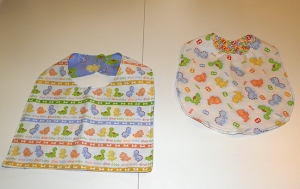
I had found some really cute baby themed fat quarters, so I made two extra bibs using the originals as patterns.  You can never have enough bibs with an infant right?  Here’s the second set of bibs.

Baby Gifts Round 2

Baby Gifts Round 2

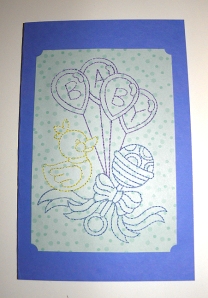
Then to top off the gift, I had to machine embroider a card for the new addition.  The baby cards are so cute.  Here’s the photo.

Machine Embroidery Baby Card

Machine Embroidery Baby Card

What fun baby gifts are to make and give.

It has taken me a really long time to get a post together, so I’m trying to get back in the swing of things.  I have an exciting new purchase/addition to my sewing studio that I’ll be posting about soon.  Thanks to my wonderful husband for all of the assembly procedures.  I just purchased a Bernina quilt frame and Quilt Motion for my 830.  I am so excited to get it all set up and start playing with it.  I am hoping this will really help me put a dent in my unfinished quilt tops that are stacking up in my sewing space.  We have the frame set up to the full 10 foot length so I’ll be taking over part of our living room/music room.  I’ll share photos & adventures soon (I hope).

Until next time, happy sewing & quilting…